How Ultrasound Technology Was Used To Locate Low-Level Leaks in Heat Exchangers
Ultrasonic leak detection has been used for a variety of applications ranging from energy reduction by locating compressed air leaks to quality assurance inspections such as locating wind noise and water leaks in automobiles. The secret to success is to understand what type of leak produces a detectable ultrasound and what does not, along with the techniques that can be used for effective leak identification. Once understood, there are instances where the limits of detection can be enhanced to help locate a leak in difficult situations.
Typically, ultrasound leak detection is used to locate leaks where the pressure differential is enough to produce a turbulent flow as the gas moves from the high-pressure to the low-pressure side of a leak. Most often any leak with a rate below 1×10⁻³ std. cc/sec will not generate a detectable, turbulent flow. For this reason, the majority of leak applications for ultrasound are limited to leaks above this threshold. One of the advantages of ultrasound is that leak detection is not limited to a specific fluid. The technology is open to identifying leaks in all types of gas and even fluid systems.
When confronted with a potentially difficult situation that involved locating low-level leaks in a particular shell-in-tube heat exchanger they were fabricating, Dan Rennert of Mason Manufacturing decided to investigate ultrasound. Having used the technology for a previous employer, Dan was aware of the potential for success as well as the downside. He understood that ultrasound instruments detect a turbulent flow and that to produce this turbulence, the flow rate would have to be in excess of some of the types of leaks he suspected he’d need to find. He had performed a standard hydrostatic test on the exchanger and did locate several leaks but felt there might be more, smaller leaks present.
Mason Manufacturing fabricates a variety of pressure vessels and heat exchangers for chemical, food and grain processors. Some of their clients are very demanding in terms of the quality of products they order. They expect Mason Manufacturing to deliver a leak-free product, and Mason in turn pursues all options to meet these demands.
Dan considered utilizing helium testing, which he felt would find smaller leaks than ultrasound typically can sense. His concern was two-fold: the proximity of the tubes and the time it would take to identify the leaks. Typically helium detection is time consuming in that the sensor has to be carefully manipulated around the test area. In addition there is the potential for confusion should the helium from one site drift to the sensor as it is scanning an adjacent site. In this instance the tubes in the heat exchanger were in close proximity. There was a 3/8″ distance between tubes, which could make the identification of a particular leaking tube difficult. This was a large exchanger with over 8,000 tubes in a 15-16 foot diameter tube sheet with the tubes extending several inches from the tube sheet. Manipulating a sensor around this configuration could take days to complete.
Since Dan had decided to investigate the use of ultrasound leak detection for this application, he consulted Mr. Mark Goodman, VP of Engineering at UE Systems. Mr. Goodman agreed with Mr. Rennert’s concern that the leaks might not produce enough detectable ultrasound since they were slow forming and low level. He suggested that they use a method called Liquid Leak Amplification. This incorporates the use of a surfactant with low surface tension. The heat exchanger is pressurized and the liquid is applied to sections of the tube sheet. This is similar in nature to the typical “bubble test” with one exception. The fluid used has low surface tension so that a low-flow leak will form a bubble that will burst almost immediately. This produces a detectable ultrasound. Standard soap and commercially formulated bubble test solutions when used on low level leaks (typically below 1×10⁻³ cc/sec) will take a much longer time to form bubbles and an even longer time for the bubble to burst. Plus, with unusual configurations such as in this case where the tubes extended beyond the tube sheet, the bubbles would not be seen and, therefore, the leak would not be detected.
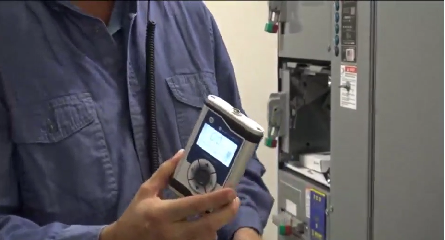
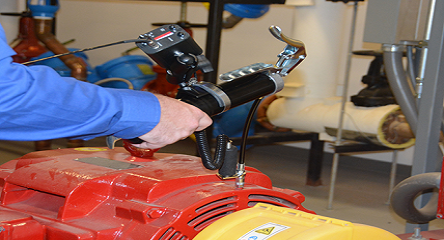
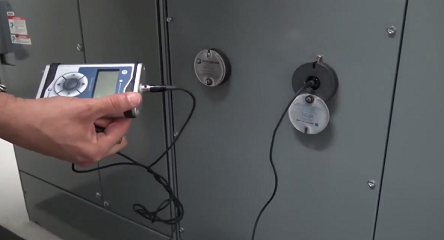
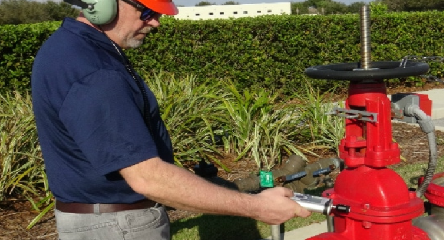
Mr. Rennert decided to try the Liquid Leak Amplification method. He pressurized the heat exchanger to about 50 PSI and sprayed the Liquid Leak Amplifier on four-foot-square sections of the exchanger tube sheet. It is usual with this procedure to have a number of bubbles form upon contact with the tube sheet, so he waited until the initial formation of bubbles subsided. Dan then plugged in the scanning module and began to scan along the tube sheet section with the ultrasonic sensor. He repeated this process of spraying the liquid onto one four-foot section at a time, waiting and scanning. He identified the leaks by detecting what he describes as a slow “pop-pop” sound occurring about 1-2 seconds apart. While he did not see the bubbles, he was able to confirm the leak by noting that the popping sounds did not occur around any adjacent tubes. It took him only 8 hours to complete the scan of 8,000 tubes. Three leaks were identified in addition to those he had located previously with the hydrostatic test.
Convinced that he had found and repaired all the leaks, he sent the heat exchanger to his customer. It would have been extremely expensive for their customer if they had a leak in the heat exchanger since the leak would have contaminated their product. With this procedure, Mason was able to deliver a leak-free heat exchanger to a very satisfied customer.
In the future, Dan anticipates using ultrasound for large exchangers to be sure the gaskets are tight. They will use it before a hydro test on these exchangers. As Dan explained, “If you have an exchanger that’s 10-11 foot diameter and fill it up with water, that’s a lot of water.” Dan estimates that this will save them many gallons of water. His procedure will be to add 5 psi of air after the gasket has been installed and test with Liquid Leak Amplifier.
Since Dan had used the ultrasound equipment previously in a chemical plant testing for steam leaks, he was familiar enough with the technology to adapt it to his current position. He anticipates using ultrasound in their shop to cut energy waste by locating air leaks. In fact he recently walked along one area in his plant near a wall and found leaks in the airline, a crack in the housing of an air dryer and another leak in an air hose.
One word of caution: any method established for leak detection has its benefits and its limitations. Leak detection is generally “hard work.” It requires knowledge of the test subject and test conditions and an understanding of the type of leak to be detected. For example, is it a liquid or a gas; is it a slow forming leak or a high-flow leak? Once understood, the inspector must decide on the technology and method best suited for the particular leak. It also requires strategy for preparation, safety, application, identification and confirmation of the leak. Some types of testing might need to conform to specific codes and standards. In addition, a method for leak management must be implemented so that the leaks are not only identified but also repaired and re-checked for quality assurance.


