The Importance of Good Maintenance Practice Based on Condition Monitoring
How Precision Alignment and Vibration Monitoring bring about Energy Efficiency and Savings
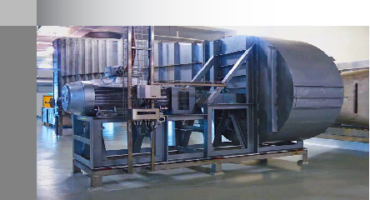
PRÜFTECHNIK Singapore
PRÜFTECHNIK S.E.A. PTE LTD. is part of the PRÜFTECHNIK Group.
Vibration as An Effective Maintenance Methodology
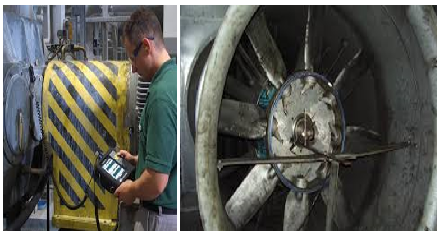
Nowadays, vibration measurement is increasingly becoming the most important subject area for the reliability maintenance parameter. It is indeed a powerful tool that allows analysts to determine the cause of machine faults. This is often done by observing the time waveform, spectrum and phase characteristics of the vibration of the designated measurement point.
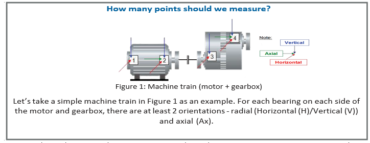
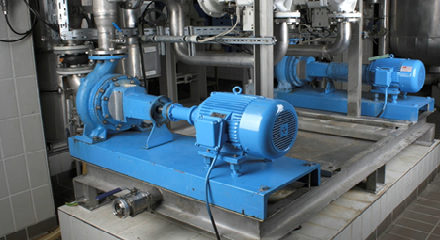
In a simple machine train like the one above, we are required to take 10 measurement points. Imagine taking measurements for a whole plant (with at least 100 machine trains of different types and complexity)!
With the help of PRUFTECHNIK’s innovation in condition monitoring devices, it is now more convenient to collect the vibration data from each point. From online/permanent systems installed to portable devices, users can choose their preferred way of monitoring the condition of their machines. Moreover, analysts will not need to worry about the collection and quality of data, thus, enabling them to concentrate their efforts on interpreting the data. Assistive/user-friendly systems, such as Vibcode and tree hierarchy system, are among the many ways in which identification of measurement points and collection of enormous amounts of data can be made simpler and easier.
Whose Fault?
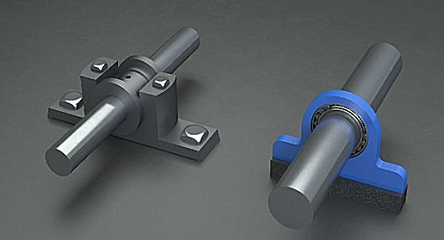
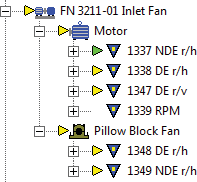
The following case study is from one of Pruftechnik Singapore’s (PTS’s) clients in the healthcare manufacturing industry. Early this year, PTS’s service team was contacted by our client when the online vibration monitoring system in their machine’s dryer inlet fan reached an alarm value of 12 mm/sec rms. After our team conducted thorough analysis of the data, they suspected that the severe vibration was caused by bearing failure on the pillow block and shaft. These faults can be identified from the vibration results in Figure 4. The sign of bearing impacts and degradation are indeed present. We will later see that the pillow block and shaft bearings are rusty, which caused bearing failure and noise.
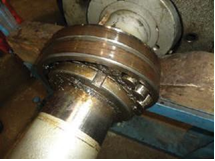 Figure 3. Faulty Bearing
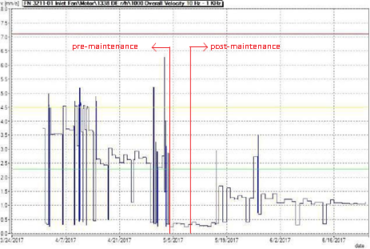 Figure 4a: Vibration data of Mtr DE
– Pre-maintenance (high fluctuations vibration) and
– Post-maintenance (lower, more stable vibration)
While scheduling an appropriate shutdown for proper maintenance, our team conducted temporary maintenance to prolong the life of the machine. Grease was applied on bearings to reduce the impact of the vibration (which was reduced to 7 mm/sec rms after greasing), in the hope that the machine would still be able to function until the scheduled shutdown.
A detailed timeline for maintenance activity is also planned carefully to ensure the maintenance can be done on time and efficiently, without disturbing the production schedule of the factory. An example of a typical maintenance timeline is shown in Figure 5, where PTS collaborates with two subcontractors for maintenance activity.
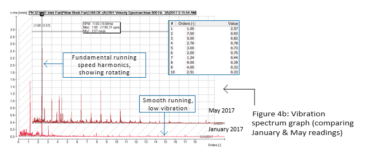
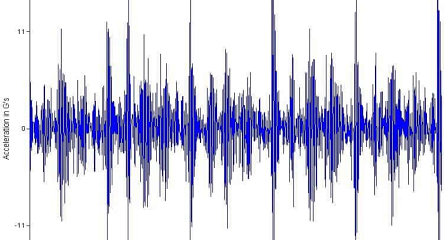
 Figure 4c. Vibration time waveform graphs (comparing January & May readings). Vibration signature indicates high impact on bearing experienced in May (just before maintenance).
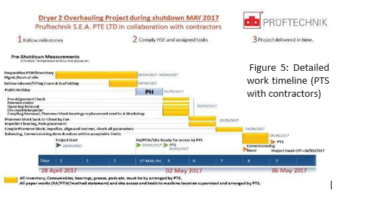
Pre-Maintenance Preparation
Before the maintenance activity, preparation is done to ensure effective maintenance and safety are not compromised. Chain blocks and scaffolding were set up, and the machine was disassembled to check the condition of the motor and pillow block bearings. As expected, the bearings were found to be rusty, which caused impacts and, thus, the bearing condition deteriorated and failed. This can be seen in Figure 6, and the vibration signature can also be observed in Figure 4.
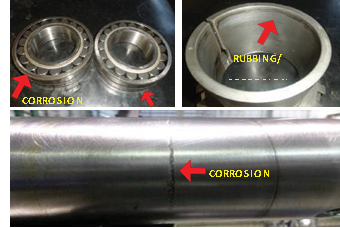 Figure 6. Wear found on bearings and shaft
The Maintenance
Based on the assessment done by our service team, the machine’s shaft would require refurbishment (using laser cladding), and the pillow block bearings would require replacement. PTS worked closely with its subcontractors for replacement of machine parts. In this case, the corresponding pillow block bearings were sent to one of our subcontractors’ workshop and the replacement was done under the supervision of PTS’s engineer.
Precise measurement and mechanical calculation, for example shaft run-out and bearing clearance checks, are also done to ensure accuracy. Figure 7 and 8 show the measurement readings during the inspection and checks, which ensure the integrity of the maintenance done at the workshop.
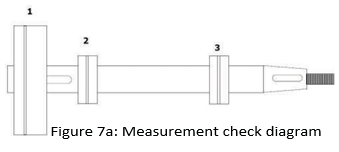
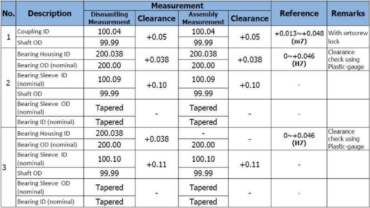
Figure 7b: Measurement check result

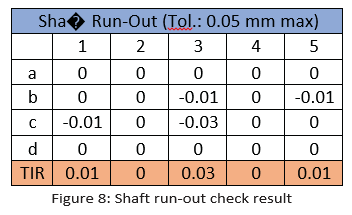
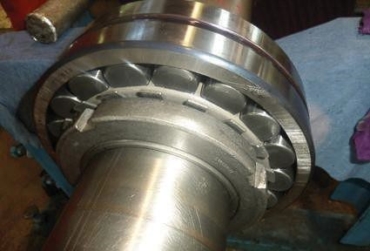
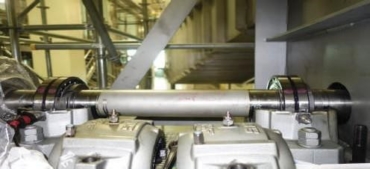 Figure 9. Newly replaced pillow block bearings
When these parts were newly replaced and sent back to the site, bearing clearance was checked again. Proper installation and alignments were crucial to ensure that the machine would operate effectively and efficiently, and different machinery parts could work at their best conditions.
Alignment
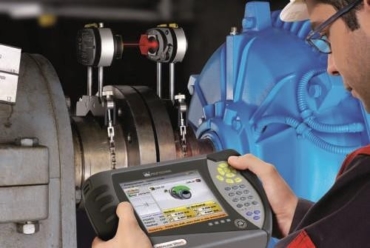
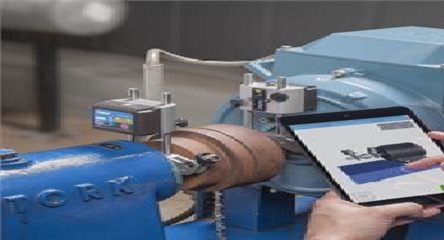
Using PRUFTECHNIK’s Rotalign Ultra iS, our engineers conducted a precision alignment job, ensuring the different machinery parts were aligned to each other horizontally and vertically.
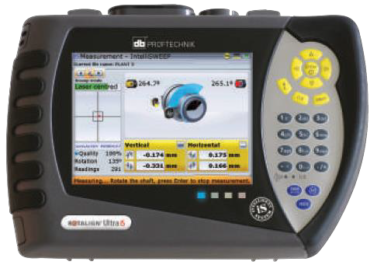 Rotalign Ultra iS (Intelligent Alignment Platform)
This activity is all done on site with our portable device, thus enabling our engineers to do adjustments all at one time.
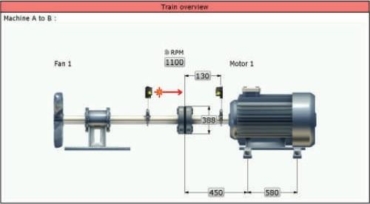
The alignment job can be simplified into 3 steps: dimension, measurement, and result.
1. Dimension
The machine’s dimension is keyed into the system. With the use of graphic display, users can easily identify the required dimension of each machine.

2. Measurement
When the laser is attached on the shaft and the on-screen laser beam is adjusted, the shaft is rotated in the direction of its normal working rotation. Using Continuous Sweep measurement mode, hundreds of measurement points are automatically taken, which helps us to understand the misalignment condition and adjustment.
3. Result
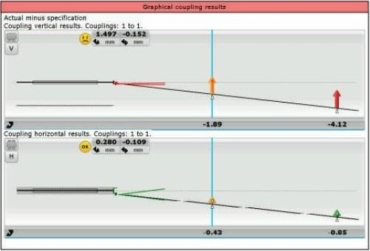
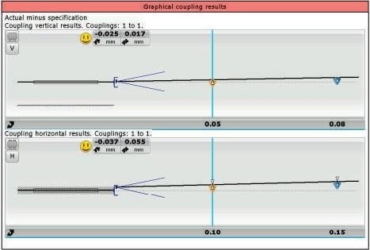
The alignment result will then be displayed on the screen with the necessary adjustment required to achieve acceptable alignment. The alignment correction is shown in both graphical and numerical format for easy interpretation.
 Figure 10a: Alignment result before adjustment
 Figure 10b: Alignment result after adjustment
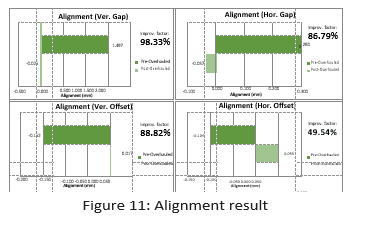
Figure 11 shows the summarized comparison of alignment results before and after a proper alignment job was done by our service team.

As indicated in Figure 11, replacement of faulty parts and proper alignment practices done by our service team tremendously improved the alignment condition of the whole machine itself. With an improvement factor of 50-98%, it is clear that the service done by our engineers is effective and would potentially improve the performance of the machine.
Quality Assurance
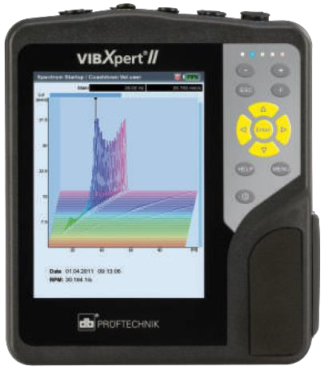
Vibration of the machine is again checked using PRUFTECHNIK’s VIBXPERT II (advanced vibration analysis tool) to examine the machine condition after replacement and alignment jobs were performed.

Vibration measurements were taken repeatedly at different speeds, starting from 360 RPM (30%) to 960 RPM (80%). This gradual increase in speed is essential to ensure the machine is prepared to operate at its maximum capacity without shocking it. We also discovered information about the machine’s resonant frequency during this testing; thus, we can inform our client to avoid the resonant speed in future. Indeed, the vibration results showed a satisfying outcome and, thus, the team did not need to do field balancing activity.
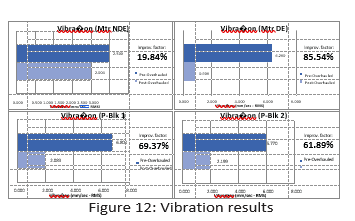
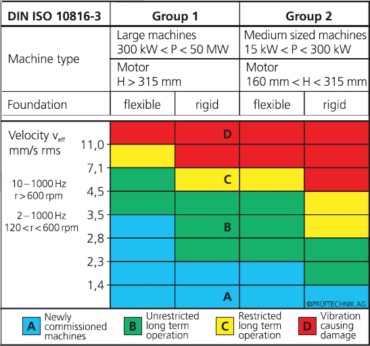
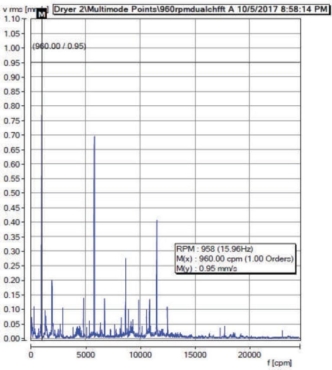
The following diagrams in Figure 12 showed the difference in vibration results before and after overhaul was done. Comparing it with ISO 10816-3/7 for motors classified in Group 1 and flexible foundations, our service team measured the overall velocity of 10-1000 Hz in ms and the vibration results are all within acceptable range.


 Figure 13: Vibration spectrum graph of P-BLK 1 after maintenance
More Than Just Vibration
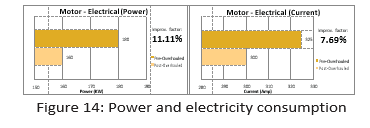
Besides reducing the vibration value of the machine, good maintenance practices also helped to significantly reduce power consumption, as seen in Figures 14 and 15.

From the above case study (data provided by client), the machine experienced a reduction of 20 kW/hr = 11% of total power consumption.
Given that the cost of electricity is $0.10/kW and the fan operates 18 hr/day, we can expect a savings of $36/day, which is equivalent to $12,816/year, with energy savings of 128,160 kW/year, just from one dryer inlet fan machine!
Imagine the savings that can be achieved through proper maintenance of the complete machine or even the whole plant!
Indeed, a proper maintenance is beneficial and, in fact, necessary to ensure good performance of machinery. With it, managers can be assured that their machine will potentially never reach the stage of failure; their factory will have less downtime and more production time, more efficient production (same output, less input) and, indubitably, a safer working environment for the workers.
 Figure 15: Power Consumption Graph

Our client applied a condition-based maintenance strategy, where maintenance is scheduled depending on the observed condition of the machine. While it is an effective measure to ensure the machine will not reach failure before maintenance, there are still better options that will better complement the efficient operation of the machine. Proactive maintenance, for instance, will ensure that the machine will always be maintained on a properly planned schedule and a slight hint of potential fault is quickly analyzed and resolved; thus, one can be sure that their machine will not be compromised and fail unexpectedly.
Summary
Implementing good maintenance practices, such as precision alignment and condition monitoring of the machine, is indeed beneficial and crucial to ensure long-term usage of a machine. With the right people and the right tools, one can achieve the best results from machinery maintenance, which are reliability, availability and maintainability of the machines. The prospect of energy savings further stresses the importance of adopting proper maintenance, especially in the current global climate change. It can potentially guarantee high return on investment and maintain productivity competitiveness, as machines will always be operating at their best condition.
Indeed, precision alignment + condition monitoring = energy efficiency.


 Figure 4a: Vibration data of Mtr DE


 Rotalign Ultra iS (Intelligent Alignment Platform)